Opening and Closing the Market
Control when customers can order and manage your market's ordering cycle
Understanding Market States
Your market can be in one of two states:
Open for Ordering
What it means:
- Customers can browse products and place orders
- Shoppers can add items to their cart and check out
- Orders are created (payment is processed at pickup)
- Growers can see incoming orders in real-time
Typical timing:
- Example: Monday 6am through Wednesday 6pm
- Or: Sunday evening through Thursday morning
- Your market sets its own schedule based on what works best
Closed for Ordering
What it means:
- Customers cannot place new orders
- Shopping cart is disabled (view-only mode)
- Orders are locked for growers to fulfill
- The site still shows products and information
Typical timing:
- Example: Wednesday evening through Sunday evening
- Or: Thursday through Saturday
- Time for harvest, packing, and pickup
How to Open the Market for Ordering
When you're ready to accept orders (typically at the start of your ordering window), follow these steps:
Step-by-Step Instructions
- Navigate to Your Admin Dashboard
- Log in to your market as an administrator
- Go to
/adminor click "Account Dashboard" from your user menu - Click the "Market Manager" tab at the top (this shows your market management tools)
- Find the Market Status Card
- Look in the dashboard grid at the top of the page
- Find the card labeled "Market Status"
- It will show either "Open" or "Closed" with status text below
- When closed, you'll see "Not accepting orders"
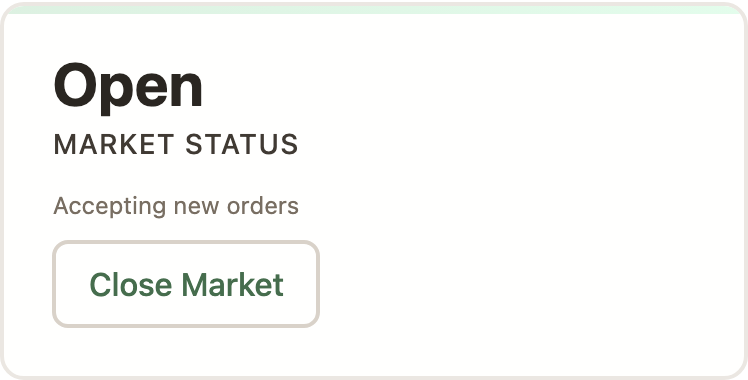
The Market Status card — one button toggles ordering open or closed. - Click the "Open Market" Button
- Click the "Open Market" button on the Market Status card
- The page will refresh automatically
- The status will now show "Open" with "Accepting new orders" beneath it
- The button will change to "Close Market"
- Verify It's Working
- Visit your market's home page
- Verify that products show "Add to Cart" buttons
- Confirm the cart allows checkout
- Check for any "ordering opens" message to confirm it's gone
- Customers can add items to their cart and check out
- Growers see orders as they come in
Announcing the Market Opening (Optional)
After opening the market, you might want to let customers know ordering is available. The weblog feature is perfect for this:
- Navigate to your market's weblog at
/weblog - Click "Add New Weblog Entry"
- Write an announcement (example: "Market is open! Order by Wednesday 6pm")
- Check "Email to all subscribers when published"
- Optionally check "Include current product list in email"
- Click "Publish Now" to send immediately
How to Close the Market
When your ordering window ends (typically mid-week), you'll close the market so growers can harvest and prepare orders.
Step-by-Step Instructions
- Navigate to Your Admin Dashboard
- Go to
/admin - Click the "Market Manager" tab if not already selected
- Go to
- Click "Close Market"
- Find the "Market Status" card in the dashboard grid
- It should show "Open" with "Accepting new orders"
- Click the "Close Market" button
- The page will refresh automatically
- Verify Closure
- The Market Status card now shows "Closed" with "Not accepting orders"
- Visit your market's home page to confirm
- Customers will see that the cart is disabled
- Check that customers see a message about when ordering reopens
- Review Orders (Recommended)
- Click "View Orders" in the Quick Actions bar or the "Orders Ready" stat card
- Look for any obvious issues (duplicate orders, unusually large orders)
- Notify growers if needed about special circumstances
- Orders are locked—customers cannot modify them
- Growers can begin fulfilling orders
- Payment will be processed when orders are marked as complete/picked up
- Any changes require manager intervention
Automated Scheduling (Optional)
Many markets use automated scheduling instead of manually opening and closing each week. This is particularly helpful if your schedule is consistent.
Setting Up Automated Schedules
Example schedule setup: "Open every Monday at 6:00 AM, close every Wednesday at 6:00 PM"
To set up automated opening and closing:
- Navigate to Market Settings or Admin Panel
- Find "Automated Scheduling" or "Order Schedule" section
- Set your opening schedule:
- Example: "Day: Monday, Time: 6:00 AM"
- Or: "Day: Sunday, Time: 8:00 PM"
- Set your closing schedule:
- Example: "Day: Wednesday, Time: 6:00 PM"
- Or: "Day: Thursday, Time: 10:00 AM"
- Save your schedule
- Test it by checking when the next open/close will occur
- No need to remember to open/close manually
- Consistent timing for customers
- Can go on vacation without disrupting the market
- You can still override manually when needed
Extending Deadlines or Reopening
Sometimes you need to give customers more time or reopen after closing. Here's how:
Extending the Ordering Window
If you want to keep the market open longer than planned (for example, extending Wednesday 6pm to Thursday 10am):
- Simply don't close the market at the original deadline
- Or, if using automated scheduling, temporarily disable the auto-close
- Communicate the extension to customers via email or social media
- Close manually when ready
Reopening After Closing
If you need to reopen the market after it's been closed:
- Go to
/adminand select the "Market Manager" tab - Find the "Market Status" card and click the "Open Market" button
- Decide how to handle:
- New orders that come in
- Whether growers have already started fulfillment
- Communication with growers about additional orders
Emergency Closures
Sometimes you need to close the market unexpectedly due to weather, emergencies, or other issues.
Emergency Close Process
- Close the Market Immediately
- Follow the normal closing process
- Don't wait for the scheduled close time
- Communicate with Customers
- Send an email to all customers with active orders
- Explain the situation
- Let them know what happens to their orders (refund, reschedule, etc.)
- Notify Growers
- Contact all growers immediately
- Let them know not to fulfill orders
- Provide timeline for resolution
- Handle Orders
- Decide whether to fulfill, reschedule, or refund
- Process refunds if necessary through the admin panel
- Update order statuses appropriately
Common Scenarios and Solutions
Scenario: Forgot to Close on Time
Problem: It's Thursday morning and the market should have closed Wednesday evening.
Solution:
- Close the market immediately
- Check for orders placed after the intended deadline
- Contact those customers—can growers accommodate, or need to refund?
- Set up automated scheduling to prevent this in the future
Scenario: Market Won't Open
Problem: You're clicking "Open Market" but nothing happens.
Solution:
- Verify you have the correct admin permissions
- Refresh the page and try again
- Check with LocallyGrown support if the issue persists
Scenario: Customers Can't Order When Market is Open
Problem: Market shows as open but customers report they can't order.
Solution:
- Verify the market is actually open (check admin panel)
- Check if products are marked as "available"
- Verify growers haven't set quantity limits (all sold out)
- Ask customer to refresh the page and try again
Scenario: Need a Different Schedule This Week
Problem: Holiday week means a different schedule than usual.
Solution:
- Temporarily disable automated scheduling
- Open and close manually at the new times
- Communicate the schedule change to customers early
- Re-enable automated scheduling after the exception week
Best Practices for Opening and Closing
Communication is Key
- Let customers know your schedule (e.g., "Order Monday-Wednesday, pickup Saturday")
- Send reminders when ordering is about to close
- Announce schedule changes well in advance
- Use your market's home page to display current status
Timing Recommendations
- Many markets find success opening early Monday morning (gives full workweek to order)
- Closing mid-week (Wednesday/Thursday) gives growers time to harvest fresh
- Weekend pickup works well for customers' schedules
- Your market's needs may vary—choose what works for your community
Consistency Helps Everyone
- Keep the same schedule week-to-week when possible
- Customers will learn your pattern and plan accordingly
- Growers can plan their harvest schedules
- Use automated scheduling to maintain consistency